Wednesday 28 March 2018

Abel Archer 83-84 25-03-2018

This is a quick update on a recent day of play I had. Tony Baker and I decided to use a MADGamers gaming day to run through the Rapid Fire Abel Archer rule set. If you have followed me here before you will know that I had another game recently with this ruleset. This game was set as a prequel to that game. For this we decided in advance that we would play the scenario twice with each player getting a chance to switch around. 


One of the key differences for this game was that would be using the random event cards that Tony has come up with for the game. This is a set of random events some of which are beneficial, some of which are amusing. There are as many blank cards in the deck as there are usable cards to make it suitable random. 

As always I have a load of pictures to accompany the story. And I am always happy to discuss the details in further detail. If you wish to do that grab me on the forum or Facebook group. 


Game 1 
For this scenario it is set immediately before the bridge scenario that we played last time. Tony Baker played the NATO force and I played the WARPAC forces. The WARPAC forces was made up of an advance element and a main force. The NATO element was a battlegroup.  For this I drove my advance force down the main road only leaving it once contact had been made. The Infantry pushed to the town to force their way in. The armour pushed forward to press the baseline. The NATO forces where deployed with the Tank Troop at the baseline and the infantry in the village. After four turns the main WARPAC forces started deploying to the table. By turn six it was all done and dusted.


Game 2 
This was an exact copy of the previous game but with the payers reversed. Tony Baker played the WARPAC forces and I played NATO forces. For this I deployed the NATO forces with the Tank Troop quite far forward too allow quick and early contact.  Again after four turns the main WARPAC forces started deploying onto the table and by turn six the game was complete.


Game 3
For this game we used the same forces as before but added a Divisional air asset and two Striker elements to the NATO force and a Divisional air asset to the WARPAC forces. The scenario was changed slightly with it being a  holding action with three objectives on the table and the players having to hold at least two of the three to win the game. To decide who played which side we rolled off and I got to choose. Having chosen NATO as my force. I decided to concede one objective and defend the rest hard. I placed the Tank Troop at the back and in the cornfield. With Striker placed forwards with the Scimitar and Scorpion and infantry elements. The WARPAC force split and infantry elements rolled down the road towards the village. For this NATO operated a “Shoot and Scoot” policy the Scimitar, Scorpion and Striker elements moving frequently having fired. The Tank Troop (with Class one guns - stabilised) stuck firm on the baseline firing as targets of opportunity presented themselves. Moving if no targets looked likely to be present. Time forced us to shorten this game after four turns but as it was it was looking closer to call than the previous games. In this game there was more of a presence from air elements. 


Conclusion 
A good day’s gaming was had by all. We are starting to get a good handle on the rules. The random event cards worked really well and we will be using them for the Demo games when we take it on the road. Our plan is that we play this scenario on the first day of any show and the Bridge scenario on the second day. With the results of one feeding into the other. 


As always I have a load of people to thank. MADGamers Club for hosting us. Tony baker for being a gracious and courteous opponent. As I said earlier if you see me at the shows or on the forum or Facebook group do drop me a line or chat as I am happy to talk about this.
--------------------------------------------------------------------------------------------------------------------------Author

Denis Jackman is a stocky Irish man with a love of history and a passion for designing and running games. He can be seen at some of the regular shows (mostly drooling over other people's work). He works in IT and writes his own blog at TableTopMadness. He can also be found lurking in the various forums and groups. Do drop by and say hi.

Tuesday 27 March 2018

Gaming the Falklands war - part one


Sometime last week me and a mate were chatting about the Falklands war and what types of kit the British and Argentinians had and their platoon structure. For the British it was relatively simple to find the platoon breakdown, however I am assuming in time of war and operation, troop weapons etc were rather liberally provided specific to the operation (For example I have heard of several assaults were many more then the section commander smg were used and even Milan's as bunker busters), however it was quite tricky to find Argentinian orbats. The information I found was sketchy and varies greatly with sections/companies/platoons all being differently translated. Even more confusing a section ("Sección") was composed of four platoons whilst A company of infantry had three Sections. (Some had four)

Thanks to the infamous ‘Tango’ from TMP, whom actually served I found the breakdown and it was rather confusing in terms of wargaming

First Sergeant is the leader of the Section. One Sergeant is his second in command, the first platoon had another Sergeant and a Corporal, platoons two to four had only corporals. Each platoon was from 10 men (8 to 12).
Each corporal designated a "dragoneante" (one red bar on his arms) who was a leading men of his platoon. He was the second in command of the platoon.
At combat, a 2nd lieutenant or sublieutenant (Subteniente) took command of the Section (Sección) and the first sargent went to second in command.
Why was this?
Because when you trained, you never trained with officers.
You only trained with NCOs (the worst in the world!).
The only officer who went to see the Company training was the Captain (time to time). Any complain about the NCOs was to be direct in the face of your Captain. Imagine how easy was that! In front of your complete unit in formation!.
Returning to the composition, each Infantry Company had a Captain at charge and a Lieutenant as second in command.
So, you had:
1. Captain.
1. Lieutenant.
2. Sublieutenant.
2. First or Staff Sargents.
4-6 Sargents.
12 corporals.
12 Dragoneantes.
100-140 soldiers.
HQ Company. a Major or senior Captain plus 20 men (two platoons) No heavy weapons.
Those 20 men were only to "serve" the Major and the senior Captain. Usually then never went to combat.
Those 20 soldiers were "recommended" (sons of military or politics, etc) and were most servants, waiters or errand boys. In Falkland (Malvinas) they had to be messengers and carried the wounded.
About the support heavy weapons, the Marine infantry had 60mm mortars and the Land infantry had 81 mm mortars. Only two for each company.
So in a Regiment you had 6 mortars (half never work).
You also had two MAG's (they work very well) served only by NCOs. Soldiers had no training for machineguns. It was prohibited. Recruits only can carried the ammo or the wounded.
So… when the "brave" Sergeants decided that the combat began to be hot and retreat to "inform to the officers" we, the conscripts had to managed to used them "in the spot".
The most decorated Argentine soldier was one of my Regiment because with one MAG sustain for a long time his position with no support (all of his buddies were dead).
He is well known even by the English.
Bazookas? I had not seen any but yes, I saw the blowpipes when they arrived at the islands.
Impossible to forget!.
The senior Seargeant took one and said that is was so easy to used that he didn't need to read any instructions (who were in English and of course he decided that not want any translation from one of his soldiers who had studied that idiom). He point to a ridge, fire and the projectile shoots out…backwards! destroying a pile of drawers with supplies distant at 100 meters.
The face of fear and surprise of that ignorant fool was so comical that all the Company began to laugh to tears!.
Before that, the imbecile decided that those weapons cannot be used!.
He never would accept he was wrong. And so, we had not any to use at combat.
The machine guns Cal.50 were amalgamated to another independent unit not from the Regiment.
At war, the Chief Regiments (Colonels) decided to conform a new unit (Company level) with the best soldiers (?) as snipers and special tasks (as commandos).
It was the "mobile" Company.
Those Companies were conforming with two Sublieutenants, two sargents, two corporals and 40 men.
I was one of the fortunate chosen.”

As this is a little to detailed for the wargame section I reworked the force –

Argentina Forces wargame


Company HQ – 10 men (FN FAL & SMG)

3x Rifle Sections ('Platoons' in British Army), each with:
HQ Group – 4 men (FN FAL & SMG)
3x Rifle Groups ('Sections' in British Army), each of 10 men (FN FAL)
Support Group – 2x FN MAG (bipod) & 3-6x Super Bazooka

Company Support Section – 2x FN MAG (Sustained Fire tripod) & 2x 81mm mortar

Regimental Support Company options:
6x 120mm mortar, 6x M68 105mm RCL, 2x Blowpipe or SA-7 'Grail', 2-6x .50 Cal & Recce Platoon

What Figures?

Next tricky question was which figures to use.  You’ll need troops with uzi, Stirling SMG’s, 50  cals, FN MAGs, bazooka, 81mm mortars and SLR rifles. Uniforms, looking at some of the pictures from the Falklands you’ll need the M1 helmet, generic webbing and some cold weather parka jackets.


All sort of fits with PSC (armiesarmy) metal range of Dutch troops. Uzi, 50 cal, 30 cal, 81mm mortars, SLR, FN MAG, Stirling (Canadian) with the M1 helmet check!


One noticeable exception is the parka coat and goggles some troops wore, so a quick play with some green stuff, small hoods and goggles can be easily attached. It literally takes no more then a minute per figure, less when you on a roll and requires very little skill (thankfully!)

You basically take a blob of putty and shape it onto the shoulders. Make almost a triangle shape and using a clay shaper push the putty into position. Cut away the excess with a blade and then use the blade or another tool to add some ripples in the hood.

The goggles were a little trickier, however if you’re not to fussed it again only takes seconds. It’s a tiny tiny pea of green stuff pushed down with a clay shaper (pointy one) and jobs a  good'un. I then trim off the sides if its to thick after it is mostly dry. 

Whilst not brilliant, a lick of paint should do the job ok for me anyhow.


So, all I need to work out now is the bazooka and I might try modifying a blindcide firing figure I have or get hold of a ww1 US bazooka man. I suspect I might not even need one as very little armor in the Falkland’s.
Finally, the Blowpipe was also used, and the PSC Canadians have one of them with M1 helmet.
Part two to follow 😊

Friday 16 March 2018

Canadian Airborne - Training Operation by Harold Skaarup


Canadian Airborne Regiment on a Training Operation


by Harold Skaarup


In our present time, there are often politically short-sighted reasons that a number of countries feel their military forces and defence networks do not need to be maintained.  There is no quicker way to increase the vulnerability of your “fortress,” than to let your military arm be depleted to the point where it will be ineffective when you need it.  Those who do so will clearly find their homelands unsafe and insecure, and highly vulnerable to attack – and there will always be some group or other who hopes to gain power over the weak.  Paratroops are only one of many links in an army’s necessary suit of chain-mail.  It is the spirit, élan and professionalism of these kinds of dedicated soldiers that will ensure a successful outcome to a defense or attack.  To let such people be lost to the exigencies of political expedience is to diminish the chances of survival for the nations who make such decisions.
To understand how such men and women can be employed when conducting a modern operation, I would like to mention a typical exercise carried out by members of the Canadian Airborne Regiment during a training mission long before the regiment was disbanded.  I would imagine that a number of similar preparations and plans have been made for operations ongoing even now around the world.


A typical airborne operation begins with the Commander’s Orders Group (O Gp).  The Lockheed CC-130 Hercules aircrews, the Company/Commando Commanders and all support staffs are briefed on where, when, and how the operation will take place.  The objectives are defined, the drop points selected for the first group of pathfinders who will go in to mark the drop zone and a plan presented on how it will be defended etc.  Men and equipment are “cross-loaded.”  The loading is planned and mounted to ensure that not all the personnel from any one unit are placed on the same aircraft.  This is to ensure that if an aircraft breaks down or crashes, there will be enough troops spread out among the other aircraft to enable the survivors to continue the mission.  For example, the mortar platoon is split into two fighting elements; the tube-launched, optically-tracked wire-guided anti-tank missile (TOW) platoon is split in two fighting teams; even the Intelligence platoon with four people went on three different aircraft; the regiment’s commander is on one aircraft and his deputy (the DCO) is on another etc.[1] 
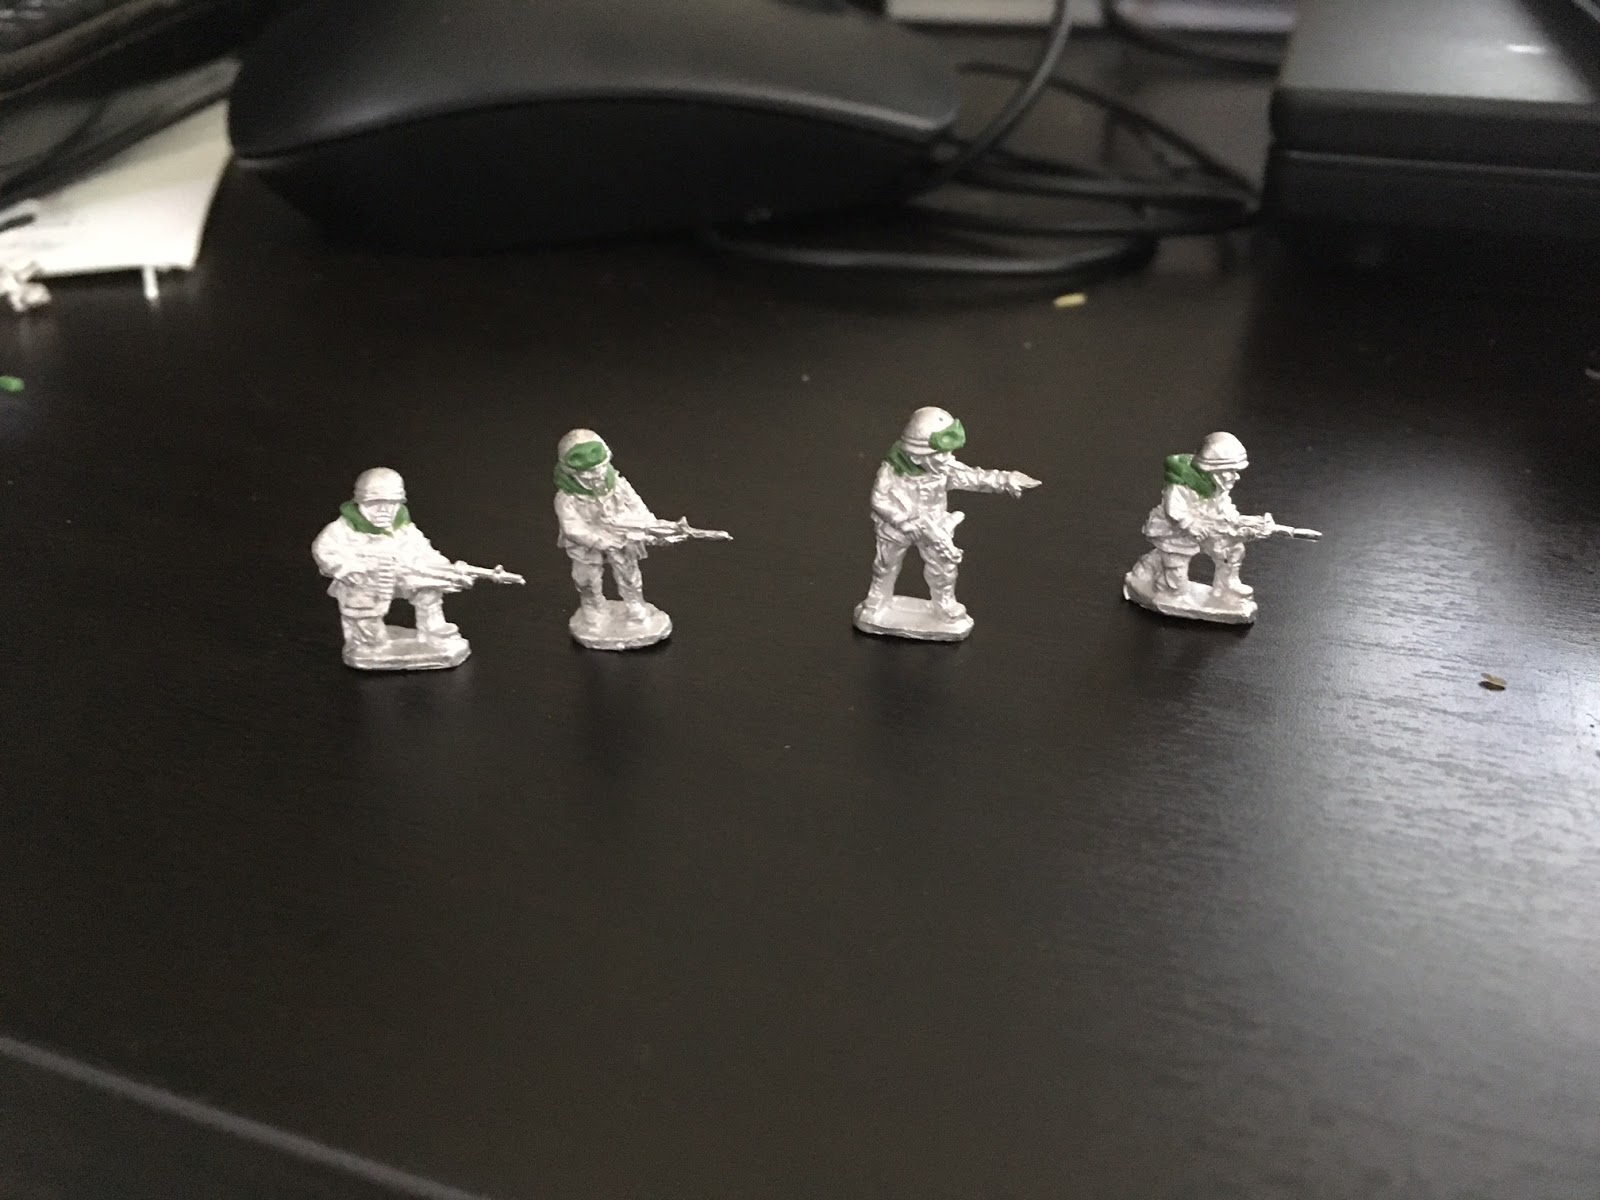
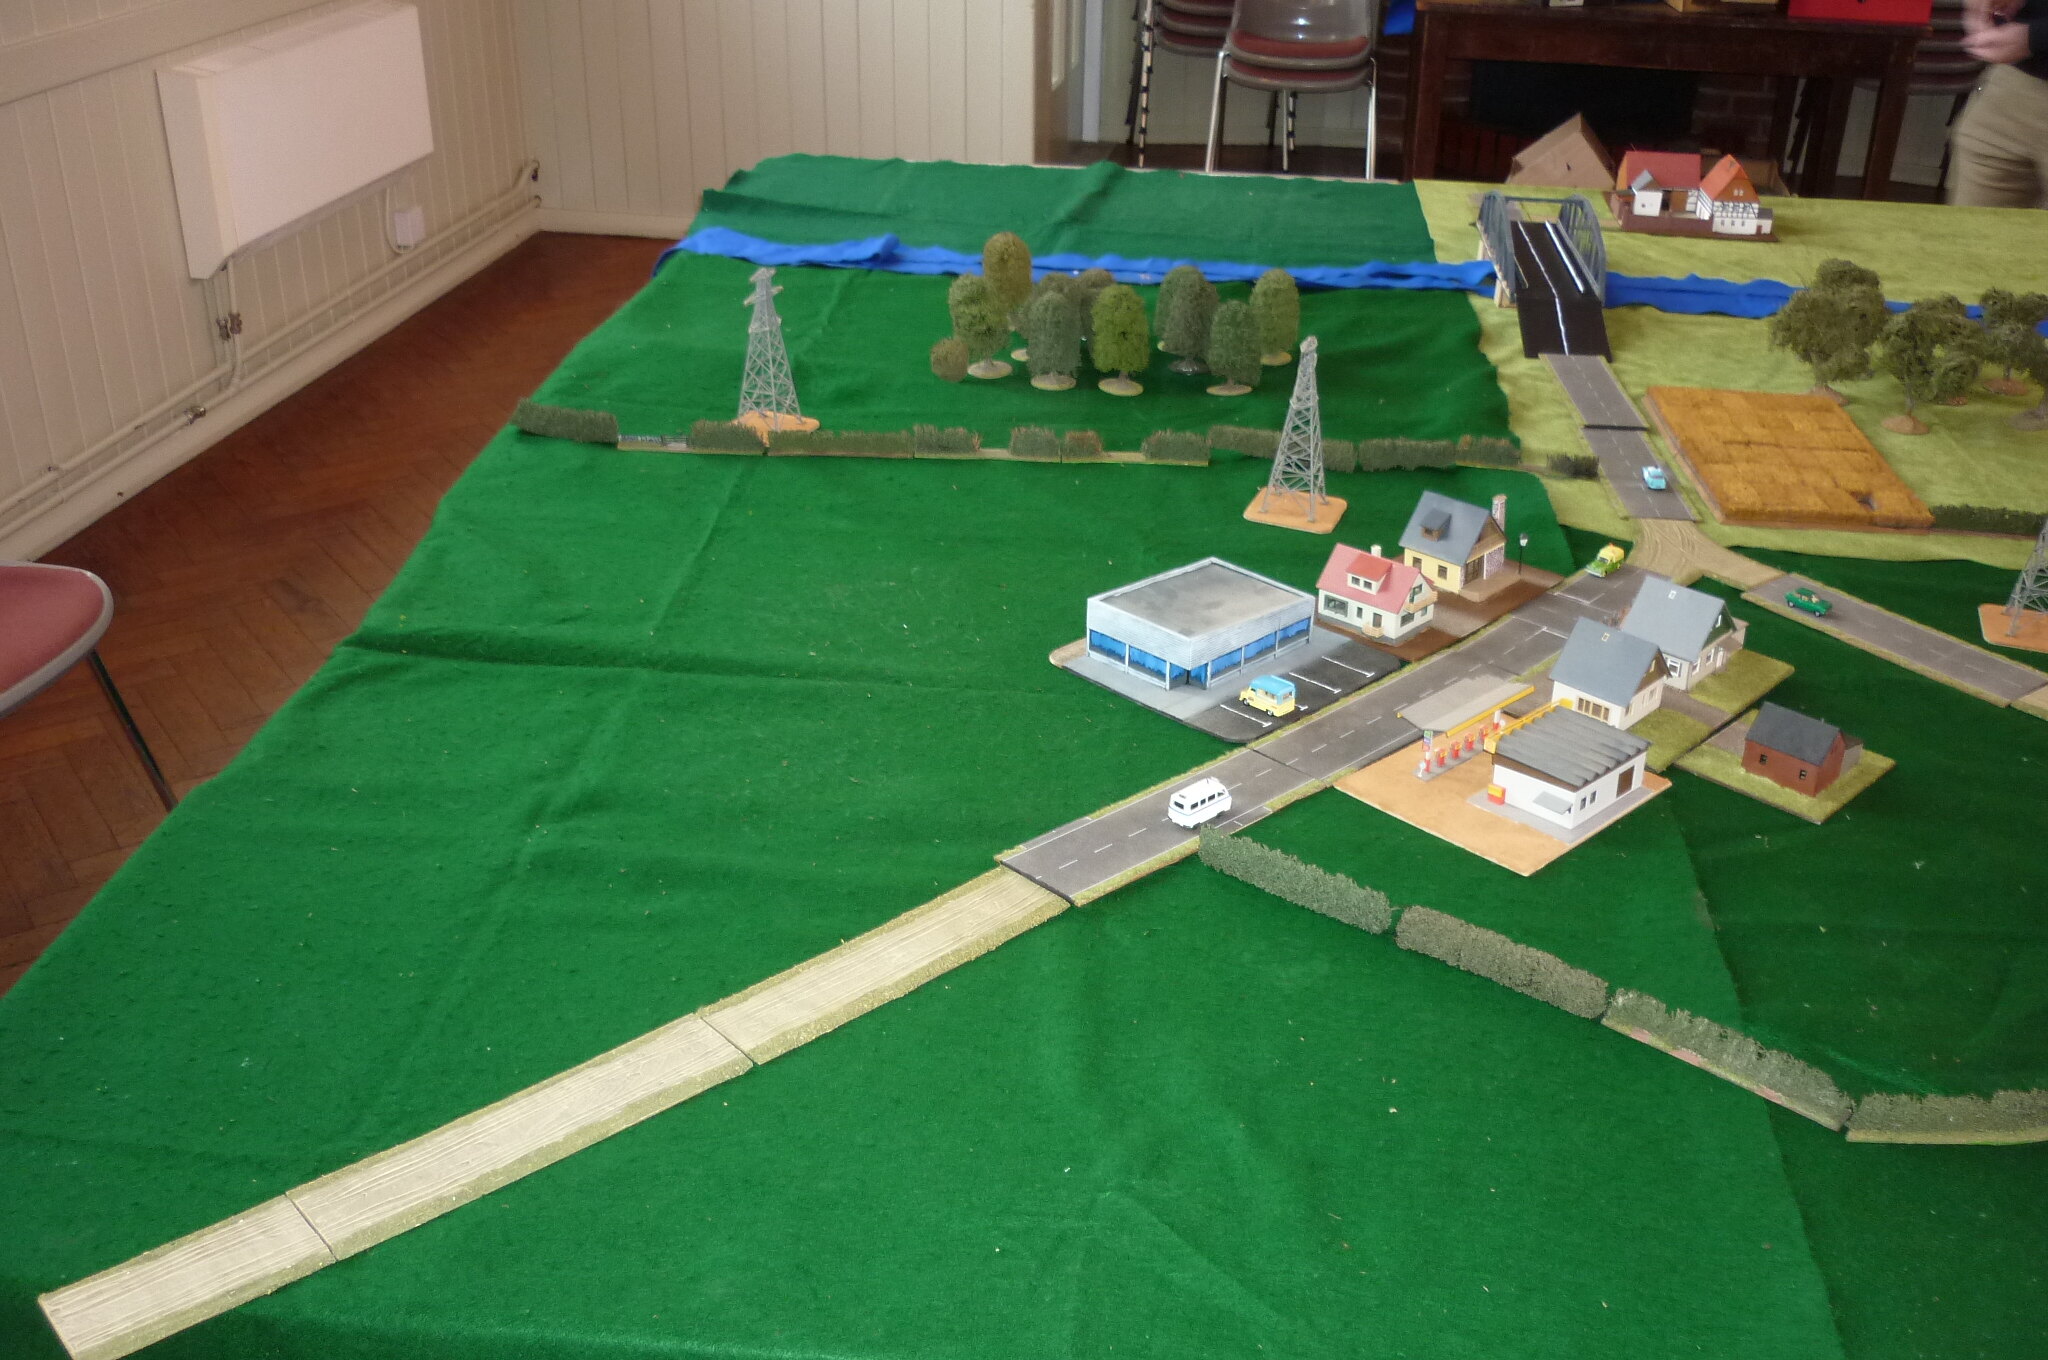
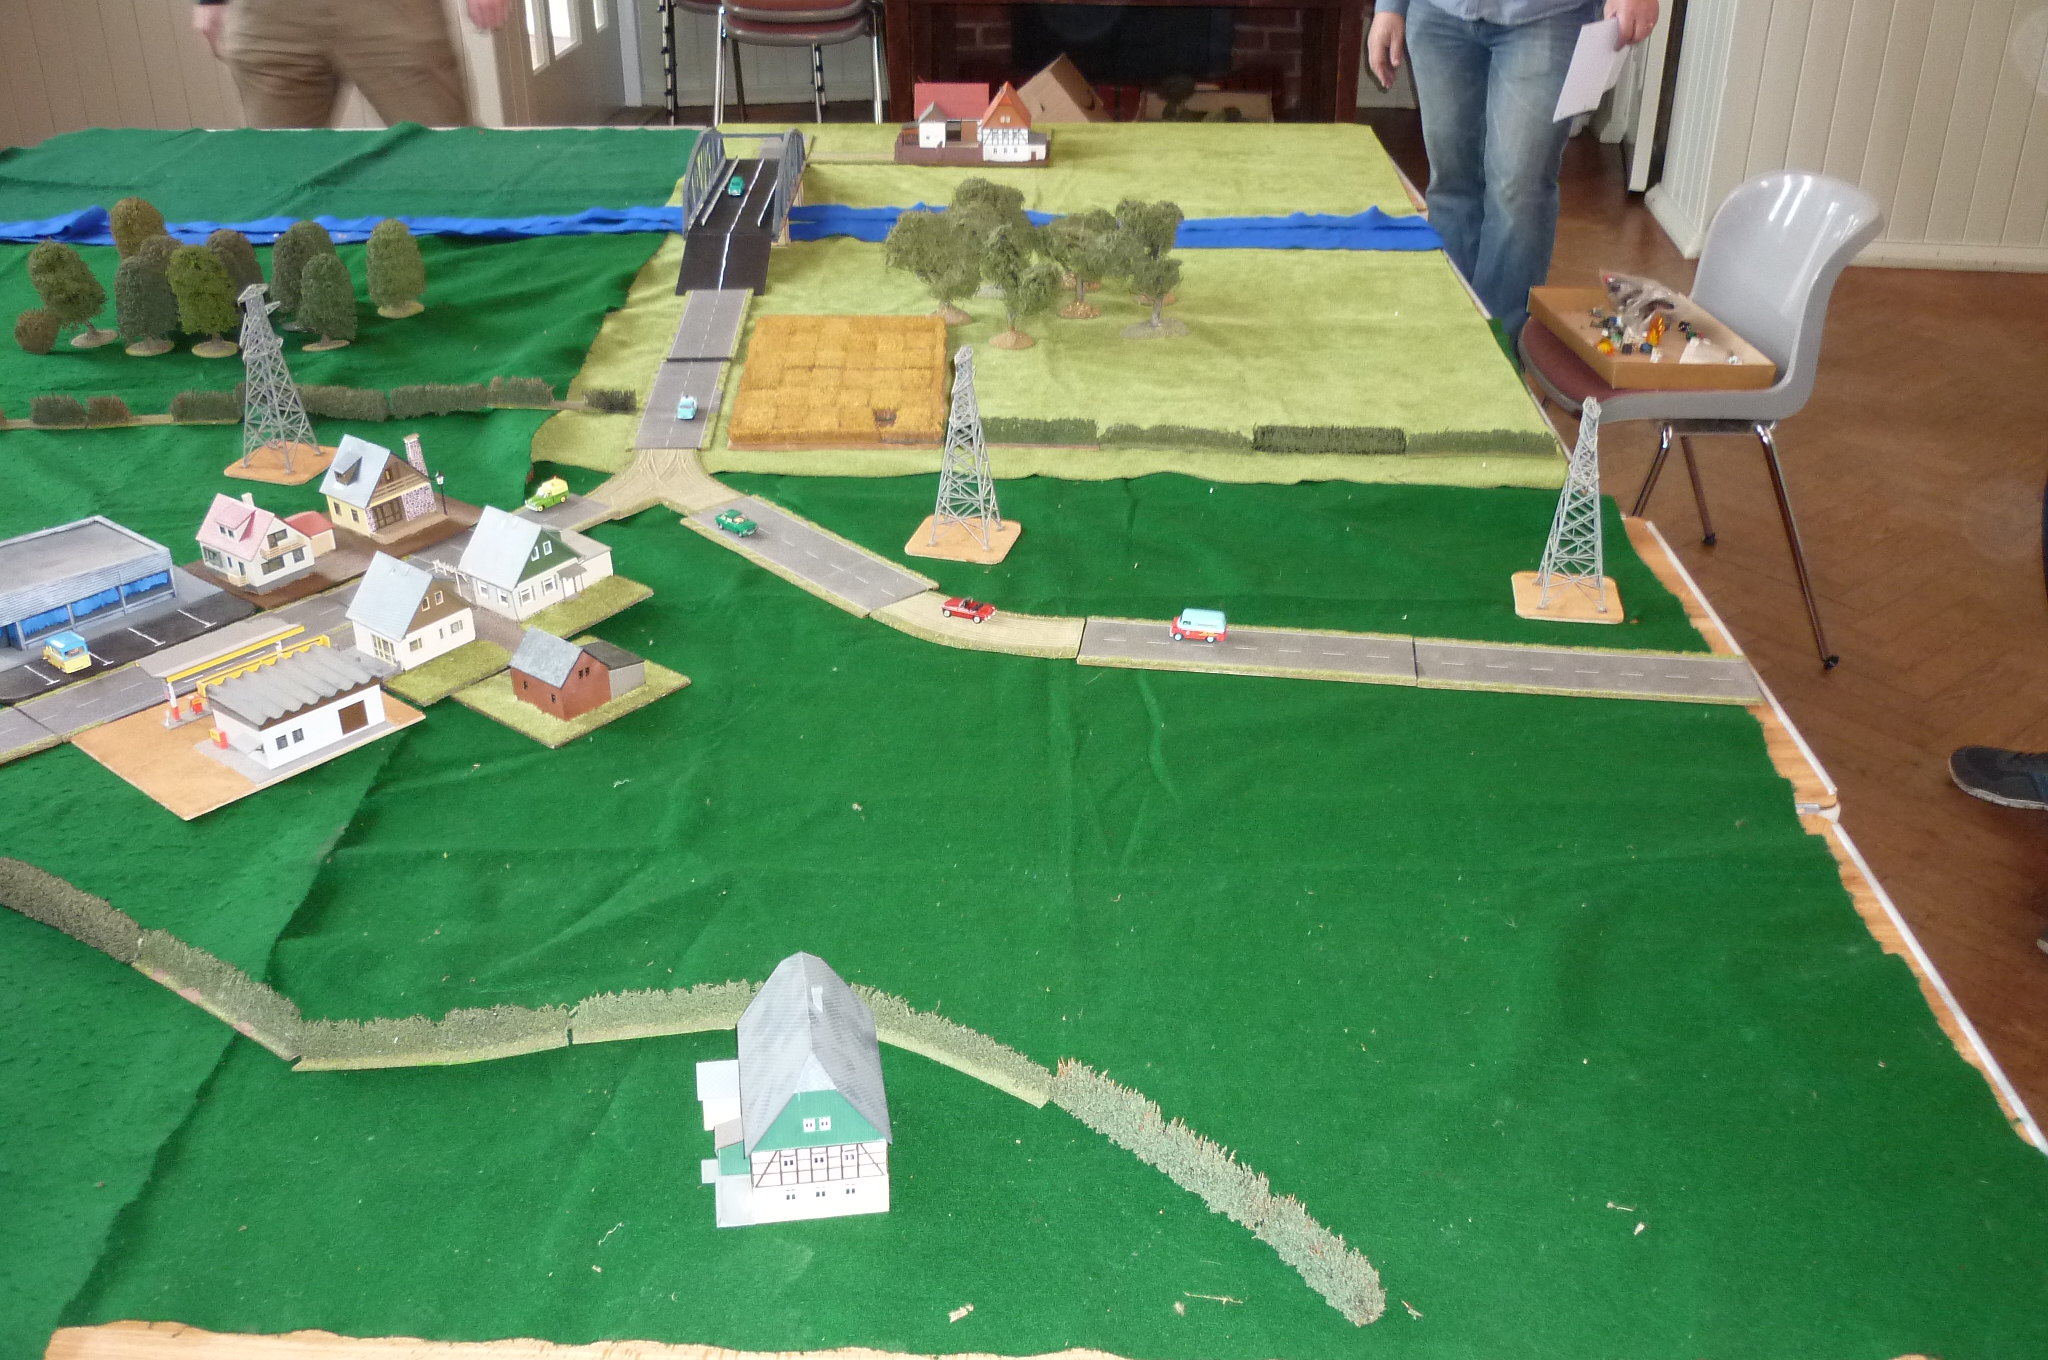
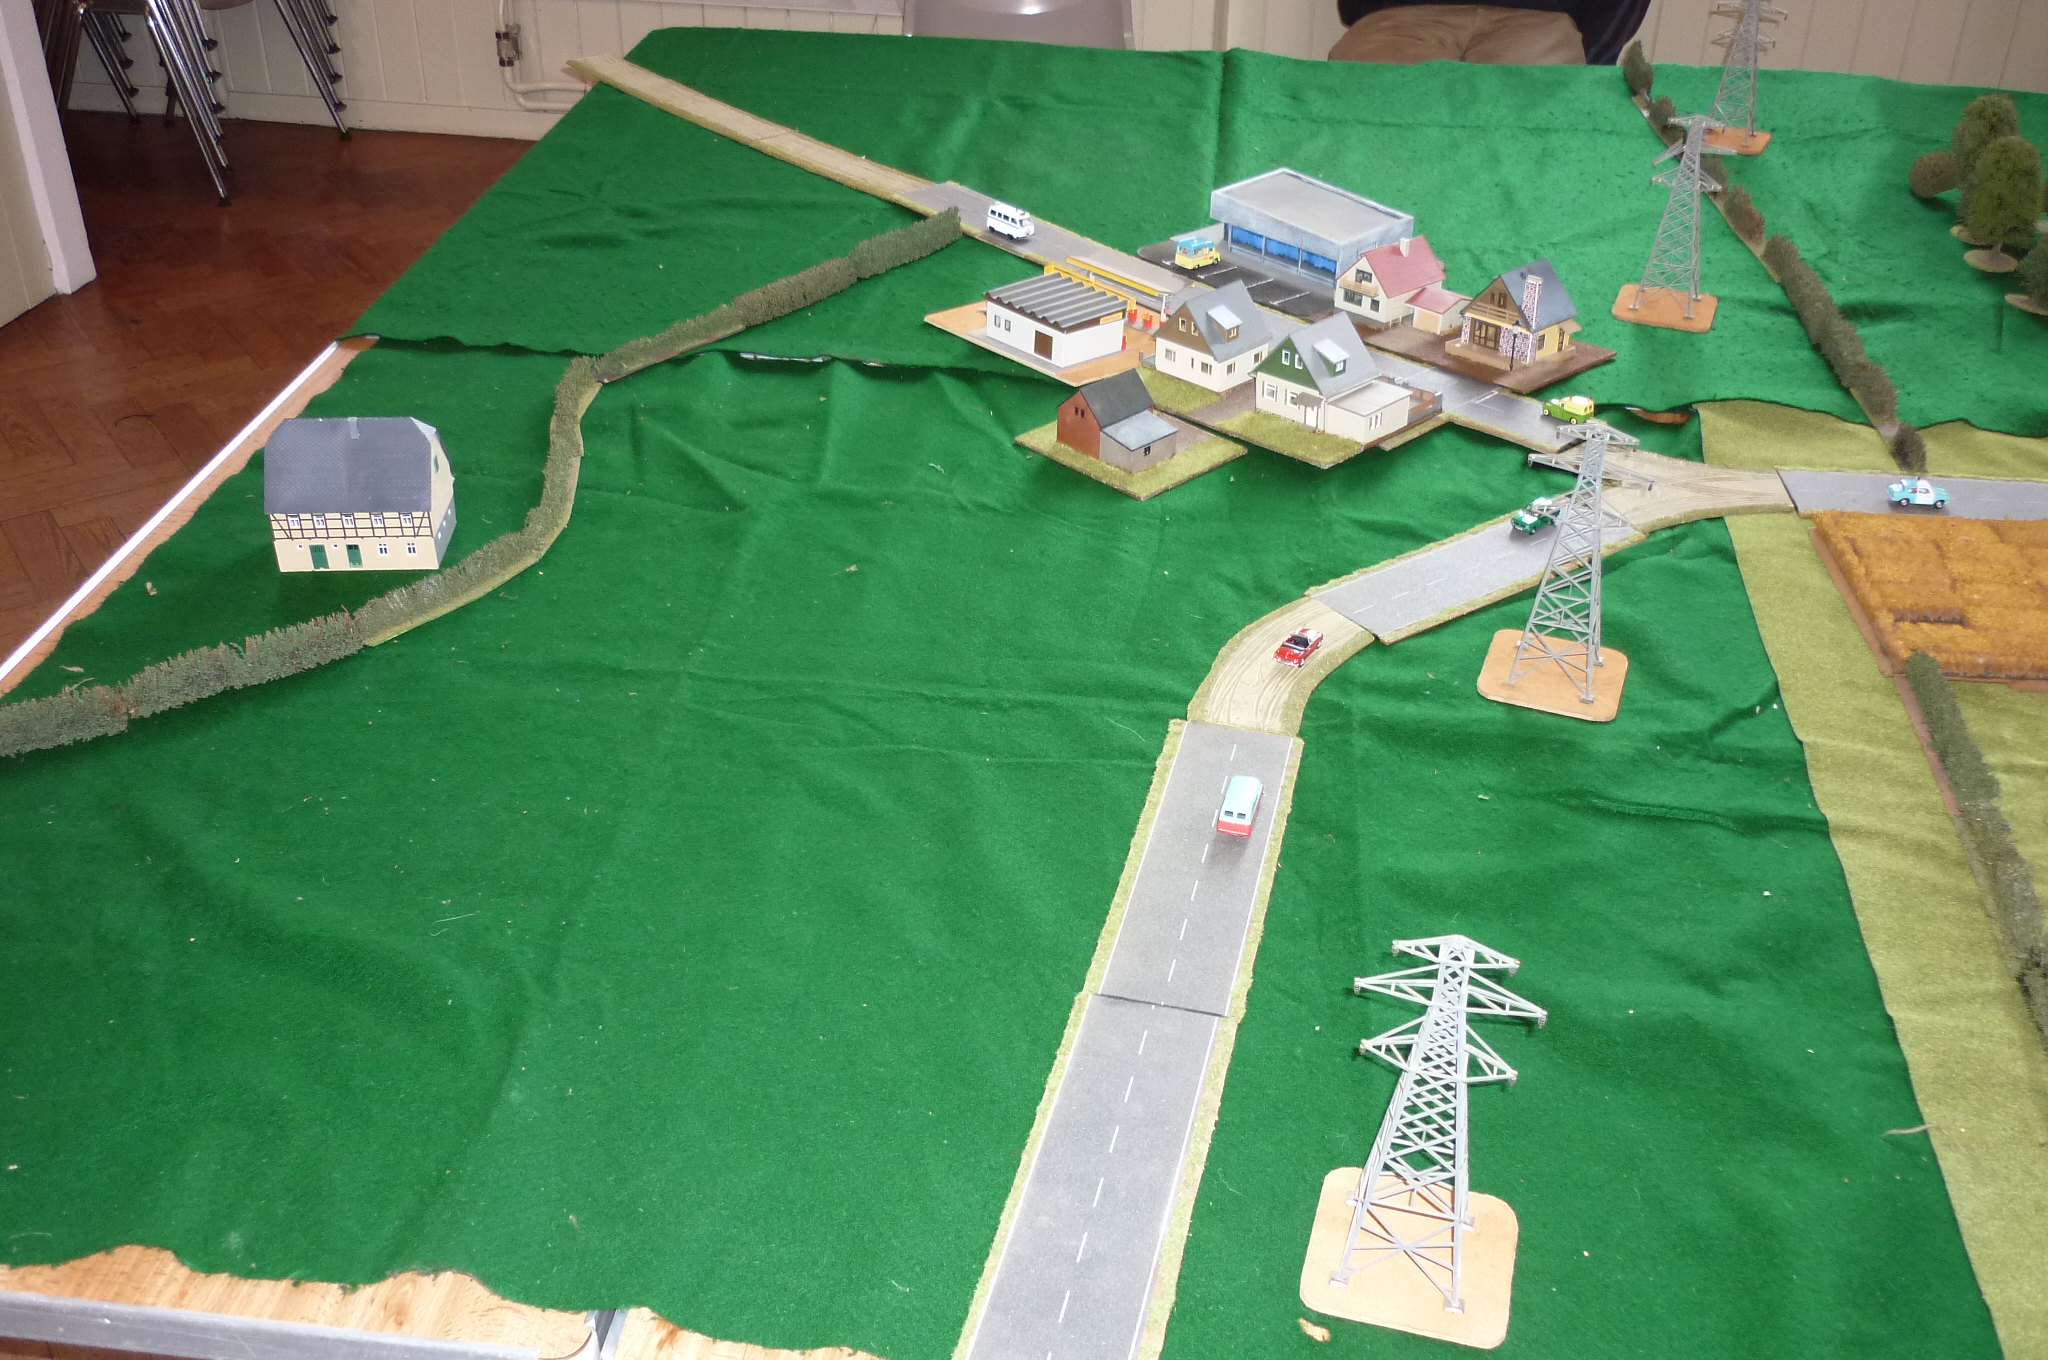
As members of the Headquarters and Signals Squadron Intelligence platoon, we built terrain models and assembled maps and briefings to cover the objectives.  In preparation, the Company Commanders would gather their Commandos (about 250 to a Company, about 650 to a Battalion, close to 2000 for a Regiment) together for a collective briefing on the operation to come.  Each unit Commander would brief his individual Commando/Company with all 250 men seated in front of the terrain model.
Every man is required to know every detail of the plan, because if some of them don’t make it to the drop-zone or the objective, others will have to fill in the gaps or carry out alternate plans.  Some will have the task of covering the drop zone with heavy weapons, some will be designated to take out guard towers, sentries, control and access points, while others cover the entrances and exit or extraction points.  Some will destroy buildings, aircraft, fuel and supply dumps and power sources, others may be designated to take prisoners, release hostages, carry out medical evacuations (Medevac) etc.  If it is to be a combat extraction, the operation on the ground will last no more than two hours.  Every man participating in the briefing is expected to understand the plan, and if only a few get through, the plan still goes ahead.
            For a night drop, the Battalion turns up at the “nose dock” (a hangar big enough for the entire front end of a Hercules except for the tail), early in the evening, with their small-arms (rifles, Karl Gustav and M-72 anti-tank weapons etc.), rucksacks and equipment ready to go.  The order to get dressed is given, and the buddy system is applied as each paratrooper dons his parachutes and mounts his rucksack and any special equipment he may have to carry (extra mortar rounds, fuel, water, extra ammunition, radios and so on).  Each jumper is then checked by a rigger, who examines the paratrooper's main and reserve parachutes, rigs his static-line and after his inspection is complete, declares him ready to go (usually with a solid slap on the butt of the jumper’s parachute harness and container).  When all are dressed, the senior jumpmaster (JM) or his deputy will then order, “Listen up for the JM briefing.”  He will then brief the sticks of men who have been prepared for their specific “chalk” load on the jump procedures appropriate to the type of aircraft they are using, such as the Hercules or Buffalo transports or Griffon helicopters, and one where, when and how the drop will take place, at what altitude, the likely wind conditions and potential hazards they may encounter on the drop zone, and a reminder of emergency procedures in the event of a hang-up (being towed behind the aircraft if the static-line doesn’t separate etc.)  The JM will then complete his orders by stating, “You have now been manifested and will jump in accordance with these orders and instructions,” at which point all will shout “HuaaH!” in response.
For a 12-plane drop, we have used fourteen Lockheed C-130 Hercules aircraft standing by with the props churning (two are back-up aircraft in case any break down or otherwise become unserviceable).  The order to embark is given, and you may imagine the picture of long lines of double rows of men marching out across the tarmac runway to board twelve separate aircraft.  (Actually, waddling would be a better description than marching, as they are heavily weighed down with parachute equipment and their rucksacks mounted in front).  The Pathfinder reconnaissance team will have flown out earlier, as they will be jumping in freefall from a higher altitude (about 10,000’ to 12,000’), and their rucksacks are mounted behind them.  Their primary job is to mark the drop zone and to secure it with their weapons.
Once onboard the aircraft, all put their seatbelts on, white lights are extinguished and the interior aircraft red lights are turned on to preserve night vision.  The aircraft all taxi out in a long convoy-like line, and take off in “trail” formation.  To prevent one long line of continuous targets presenting itself over the drop zone, the entire flight of Hercules transports is split into four separate flights of three, which will approach the dropzone from different directions each flying in a finger-three formation.
Each separate flight of Hercules will proceed to fly cross-country at a very low level until just before the run-in for the drop, and then ramp-up to the pre-determined jump altitude (1000 feet to 1,200 feet in training, 650 feet to 700 feet over hostile terrain).
About ten minutes before the drop takes the jumpmaster (JM) on board each separate aircraft will issue the first of a sequence of commands, beginning with the attention-getting words, “Look this way!”  Each paratrooper is anticipating this command and is particularly “focused” at this point, and on all succeeding commands given by the JM, which are shouted back, word for word, to ensure no one has missed hearing them.  The next command shouted out by the JM is, “Seat belts off!”  Every paratrooper reacts and complies in a coordinated and concerted action, and when ready, turns in his seat to face the JM again. 
The next command is, “Stand Up!” at which point each jumper stands up and then removes his static line snap from where it had been stowed by the Rigger in an elastic band on his reserve takes one step towards the heavy steel static line cable strung overhead and holds the snap up to the cable and prepares to hook on.  On the command, “Hook Up!” – the jumper snaps his static line onto the overhead cable which runs the length of the aircraft’s interior, and slides it to the rear for the person behind him to double check, at which point the JM shouts “Check Static Line!”  Each jumper examines the snap and static line of the person in front of him to see that it is secure, then he traces a path with his hand down the yellow nylon cord to the back of the parachute on the man in front and tightens up the slack in the elastic bands holding the remaining static line stows in place.  The second last and last men in the line make a half turn so they can check each other. 
The next command is, “Check your equipment!”  This is when a jumper takes the opportunity to move his testicles and other private parts out from underneath the leg straps and double checks every snap and strap from helmet to equipment that he is wearing.  The JM then double checks the snaps and kit of every single man in the line, then returns to his position near the exit door and shouts, “Sound off for equipment check!”  Starting with the last man, each man shouts out in succession, “1 OK, 2 OK” and so on, with the last man standing closest to the exit door pointing to the JM and shouting, “All OK,” when all have sounded off.  About this time the red warning light over the jump door comes on.  The JM and his deputy slide the doors up on each side of the Hercules, and stamp on the jump steps to ensure they are secure for “double-door exit.”  In some cases the rear ramp may be lowered instead.
By now the three Hercules in each formation are in the process of moving from a line astern or “trail” formation into the finger-three formation.   It is a spectacular sight if your are number one on the ramp of the lead Hercules watching the other two aircraft lined up behind you as they slide over to the left and right wings parallel with your aircraft.
The JM shouts, “Stand By!” and all jumpers step forward, sliding their static lines with them.  When the green light flashes on, the JM shouts “GO!”  At this moment each and every paratrooper immediately steps forward in a one-two movement (known as the mambo step), and as he reaches the door or the end of the ramp, he throws his static line forward, stamps down hard on the jump step to get a good “launch,” and exits smartly out the door, head down, feet together, hands on each side of his reserve, ready for the worst, hoping for the best, sounding out the count, “1,000, 2,000, 3,000, 4,000, 5,000, check canopy!” 
The heat and the prop wash from four churning propellers hits the jumper just as he drops below the aircraft and the big round green T-10 parachute seems to explode off his back (many times harder than the gentle openings one experiences from a helicopter jump).  The tightened harness straps keep him from being squeezed the wrong way, and after his count he will immediately look up to check for a properly open canopy.  It is extremely rare that it does not open properly, primarily due to the Canadian invention of netting that runs around the skirt of the canopy which prevents partial malfunctions.  The jumper then quickly grabs his rear risers and begins looking sharply around him all directions to watch for other jumpers and to avoid a canopy collision.  If necessary, he will slip in the opposite direction by pulling down on the pair of suspension risers in the direction he needs to steer.  If it is as dark as the inside of a monkey’s nether end, he will look, listen and feel for the wind on his face to get an idea of which way it is taking him.  If it is a moonlit night, he will watch for the wind blowing along the grass or snow which looks like waves of fur fluttering along the back of a woolly bear, to get an idea of where to land and what obstacles to avoid. 
About 300 above the ground, each jumper lowers his rucksack by pulling a special release tab, which lets it drop to hang about 15 feet below him.  It will swing somewhat, but if it is really dark, he will feel it thump first and have some warning of when he needs to prepare to make contact with the ground.  He keeps his feet and knees together and his elbows in tight as he prepares to hit and roll, arcing his body in the direction he is swinging and hopefully not landing too hard or on anything sharp. 
Once the jumper has completed his “parachute landing fall” (PLF) on the ground he has to quickly deflate his chute to keep from being dragged by pulling on of the risers towards himself, then quickly undo his reserve, punch his quick release system to get out of the harness, and very quickly extricate his weapon.  If it is his rifle, he may have to remove it from his snowshoes, and if it is a Sterling Sub-machinegun (SMG), from under his reserve.  To reduce his outline as a potential target, the paratrooper keeps low to the ground as he gathers the chute and stuffs it into the built-in bag it comes with, then dons his rucksack and he prepares to move off the Drop Zone to meet the rest of his section at a pre-determined rendezvous (RV) point.  At all times he must keep a watchful eye out for other jumpers and their equipment as they descend above him from the following waves so they don’t land on him, particularly if they are dropping a platform with one of the Regiment’s Airborne Artillery Battery guns, or an M113 A & R Lynx armoured reconnaissance vehicles, M113 armoured personnel carriers (APC), or a TOW missile mounted on a jeep.
Each Commando team is watching for the pathfinder’s markers.  A soldier may have to wave a small blue, green or red light on a pole for a few seconds every few minutes to guide each group into their RV point if it is really dark.  If there is moonlight, the jumper can use his compass to get to an observable RV.  As soon the majority of each assault team is in place, they move on to the objective.  Time is of the essence, and it is very hard to recover when it has been lost.  In a hostage-freeing scenario, the terrorists are hit according to the plan.  Sometimes changes have to be made on the spot, and paratroopers have a ready instinct for an alternate but workable plan when necessary.  In this exercise, the enemy force was taken out or neutralized, the hostages were freed and collected along with the wounded, and all injured were brought to a pre-planned collection point.
If it is a long-range operation, the paratroopers walk out.  If it is a combat extraction operation, all assemble at pre-determined points on a designated runway.  Each aircraft will roar in to land, and taxi to the end of the runway lowering its ramp as it reaches the turn-around point to prepare for take-off.  In the few seconds the non-stop turn around takes place, each stick will re-board an incoming aircraft.  When the Hercules has turned 180° and is facing the opposite end of the runway, the ramp is raised whether all are on board or not, and the aircraft takes off. 
Each empty aircraft will take a turn coming in until all on the ground have been collected.  It gets trickier loading the wounded with all due care and assistance, and no dead are left behind, so the body bags have to be carried on board as well as the extra people including hostages and prisoners.  On this exercise, which took place at CFB Borden, Ontario, more than 200 additional people were flown back, while a number on the ground made their way to vehicles hidden off-site.  In spite of the hasty activity, no one wants to be left behind to hike 25 kilometres north to an alternate ground collection point, and in this last mission, everyone and everything except those role-playing the enemy force was onboard the tenth aircraft to land, leaving the last two pilots severely annoyed because they still had to practice their rapid extraction skills minus live bodies on the ground to load. 
While airborne on the flight back, medics were very busy working to plant IV s, treat the wounded and manage triage.  Everyone helped out.  Within an hour or two, all were back on the ramp at CFB Petawawa, and very shortly afterwards slid into a debriefing room to go over what has been collected and what took place during the operation.  We will have gotten in, done the job and gotten out, as close to schedule and plan as possible.  We will also have proven once again, the Airborne gets the job done. 
Ex Coelis!


[1] The Author earned his military jump wings in 1975 at CFB Edmonton, Alberta, and later served as a member of the Canadian Forces Parachute Team (CFPT), the SkyHawks from 1977 to 1979.  From 1986 to 1989 he served as the Regimental Intelligence Officer for the Canadian Airborne Regiment (CAR) within the First Special Service Force (FSSF) based at CFB Petawawa, Ontario, when the training exercise described here took place.  He continued to serve as an active military parachutist until his retirement at CFB Gagetown, New Brunswick, in August 2011.  The CAR motto is “Ex Coelis” (from the skies).

Wednesday 14 March 2018

What if? By Harold Skaarup


What if?


by Harold Skaarup


Just exactly what aviation threat were we facing in North America during the Cold War, and why did we need fighter aircraft to protect us from the Bear that could approach from the North?  Until the fall of the Berlin Wall, we still had to prepare for the worst case scenario, even if we hoped for the best.  The events of 11 September 2001 were still a long way off in the future, and therefore NORAD personnel constantly had to train and be prepared for the possibility of an attack from the former Soviet Union.

A number of scenarios were discussed and war-gamed, with a view to the activities that would take place following an initial series of nuclear strikes by the former Soviet Union on North America.  In the days of the Canadian McDonnell CF-101 Voodoo and our American counterparts equipped with the century series of aircraft, we had to be prepared to face the Russians bomber force that was expected to follow up the initial missile attacks.  The Soviet Air Force would likely have attacked in waves, with the first air wave consisting of  Tupolev Tu-22M Backfire C attacks on the Alaska NORAD Region (ANR) radar and fighters.  The Tu-22Ms would have been escorted by MiG-31 Foxhound and MiG-25 Foxbat fighters who would attempt to intercept the NORAD controlled defence network, and all would have been accompanied by Ilyushin Il-78 Midas tankers to refuel them for the (very unlikely) return trip.  The first key targets would have likely been the E-3 Sentry AWACs aircraft and their bases, with the intent to blind NORAD controlled fighters. 

The “waves” were expected to have been continuous, with the second wave of Russian aircraft likely consisting of Tu-95 Bear H bombers carrying AS-15 missiles which would have been fired on radar sites to the Northeast of Banks Island and Alaska.  Other Russian assets could also have targeted the Polar West Long-Range Detection Team (LRDT) likely deployed to the centre North.  There would likely have been diversionary attacks by Russian Backfires operating out of Tiksi and Vorkuta.  The diversionary aircraft would have flown out to their extreme range, launched their missiles at radar sites in ANR and returned.

The third wave would likely have consisted of long-range fighters and Midas tankers escorting Tu-160 Blackjack bombers. The fighters would plough the way for the Blackjacks, punch through the holes created in NORAD’s defences by the first two waves and “clean-up” the remaining target sites, such as CFB Winnipeg, CFB Cold Lake and CFB Bagotville. The Blackjacks could have fired AS-15 Mod-2 missiles from somewhere over the mid-Rocky Mountain range South, reaching deep into the North American interior with these missiles.

It was unlikely that there would have been a round four.  The fact that Canadian Voodoo fighter pilots and their Hornet successors never had to take part downing incoming “bandits” says a lot about how lucky we all are that this scenario never came to pass.  May it continue to be so.


About the Author


Former Honorary Lieutenant-Colonel for 3 Intelligence Company (Halifax), Harold A. Skaarup, CD2, BFA, MA in War Studies, retired from the Canadian Forces as an Army Intelligence Officer and has a great deal of interest in Military History. During his service career he was deployed overseas with Head Quarters Canadian Forces Europe (HQ CFE) and later with 4 Canadian Mechanized Brigade Group (4 CMBG) based in Lahr, Germany, and with the Canadian Airborne Regiment including a deployment with the Canadian Contingent of the United Nations Peacekeeping Force in Nicosia, Cyprus (CANCONCYP).  He served with the NATO-led Peace Stabilization Force in Sarajevo, Bosnia-Herzegovina (SFOR), and with North American Aerospace Defence Command (NORAD), as well as United States Space Command (USSPACECOM) and later United Sates Northern Command (USNORTHCOM), based on Cheyenne Mountain in Colorado Springs, Colorado.  In 2004 he deployed with the Canadian Contingent of the Kabul Multi-National Brigade (KMNB) as part of the International Security Assistance Force (ISAF), in Kabul, Afghanistan.  He retired from the Army in the rank of Major on 8 August 2011.
Harold now spends his time  a volunteer with the New Brunswick Military History Museum and a writer of military history.

His books,  which include Canadian War Trophies, California Warplanes and many others can be found at http://silverhawkauthor.com/


Many thanks Harold for your article and service!


Tuesday 13 March 2018

Reading Techno-thrillers In Reverse - by Colin Salt

Reading Techno-thrillers In Reverse


By Colin Salt.


So, I’ve been reading the classic techno-thriller pioneers. Red Storm Rising itself, Team Yankee, and the early works of Larry Bond. I was in two unusual positions. The first was a general cultural/generational difference-I have not served in the armed forces and was born in 1991, a year of rather extreme consequence for the Cold War. So I will freely admit to not having the same perspective that someone who actually lived through it would have.

The second is, I feel, is more pertinent, because it’s a cart-before-the-horse issue. Which is to say, for a variety of reasons, I experienced the later imitators of these classics first, and then read them. The majority of these follow-ons had issues. Many I could enjoy as “cheap thrillers” while still acknowledging their flaws, while some were just bad. The most important thing was that I was set up for what TVTropes calls the “Seinfeld is Unfunny” effect. This is where you’ve read/seen/played so much of what’s followed/copied/been influenced by something that when you finally encounter the original, it doesn’t seem so original.
So, from top to bottom, my impressions:

Team Yankee was a pleasant surprise. It does a lot right and manages to avoid the pitfalls that a lot of other techno-thrillers fall into. How much of this is from Coyle’s writing skill and how much of it is from the genre expectations not being solidified yet is unclear and probably unanswerable. I could nitpick and criticize Team Yankee, but that would be unfair to it. I was expecting a clunker and got a smooth-flowing narrative tale of tank action.

Then there was Red Storm Rising itself. This is tricky, simply because I find it nearly impossible to grade without context. It would be a decent enough thriller absent any other context, and Clancy and Bond cannot be faulted for their book being dated. Besides the understandable politics or technical details that were shown to be inaccurate speculation later, the very theme of the book would be more wondrous to a reader in the mid/late 1980s.

I feel that one of the reasons for the techno-thriller declining in prominence was that as “high-tech” weapons became routine and commonplace, they lost their novelty factor. For a post-Gulf War reader like me, cruise missiles and stealth aircraft are routine and normal. For someone in 1986, they would be fascinating. It’s this kind of thing that makes judging it difficult. It has my pet peeve of too many viewpoint characters and doesn’t flow as well as Team Yankee did, but its pioneer status means it’s hard for me to slam it. And for historical context and an example of how wargaming and writing can be intertwined, it’s definitely worth a read for that alone.

Now it’s time for me to talk about Larry Bond’s works. I’m saying this with a very heavy heart, because of how influential he’s been with wargaming. But as a prose writer, I found that he was both by far the biggest “if you’ve seen the imitators, the original doesn’t seem so original” of the three and the least skilled literately.

This was seeing someone who’s merely decent in isolation but was prominent and popular enough that the weaknesses of his style carried over to works that ranged from “slightly worse” to “much worse”. Bond covered the land, sea, and air theaters in detail and took one of the biggest-picture views. For stories that, for publishing reasons, had to be contained in one book, I found this an issue. Because the plots and actions kept getting in each other’s way, and that was something I was quite familiar with from  
the imitators.

But the bigger problem of Bond’s two novels I read (Cauldron and Red Phoenix) was that they both squandered their entire first acts on pointless political scenes. I do not mean (just) that the politics were unrealistic or poorly written. I use the term “pointless” because all they did was spend too many pages to set up the war that was obviously going to happen anyway. These were particularly egregious to the point where some of the imitators handled it better than Bond did.

So Bond’s success unquestionably helped lead to a feeling, whether by editors or the authors themselves, that you had to have more broad-front big picture tales with political intrigue, from DC to Dusseldorf to the Denmark Strait. When combined with the publisher’s need to fit entire conflicts into one book (frequently shorter than Bond’s as well) and far too many authors being out of their element in the political scene, this had a negative effect on the techno-thriller.

This is my own taste, but I prefer more slimmed-down, low-level, grounded at tank/platoon/fighter-level stories that leave the grand strategy, grand deployments, and political context in the background. That kind of story also goes a long way towards addressing some of the other plot and setting issues that wore down the classic technothriller. And if nothing else, it makes them flow better.
Of course, all of this is simply my individual opinion. I don’t mind differing literary tastes or counterarguments in the slightest.

 Colin Salt is a gamer and writer who authored the “Command Live: Black Gold Blitz” DLC scenario in Command: Modern Air Naval Operations

Demolition Guard! by Denis Jackman

If you have followed my blog for any period of time you will know that I run a birthday game each year. It is usually a chance for me to play and each I try and pick something I have not done before and normally get someone else to run it. 

This year is no exception and  my good friend Tony Baker put on an all day “Cold War gone Hot” game. This would be in 20mm using Rapid Fire rules “Abel Archer 83-84” 

This particular scenario is based on the “Demolition Guard!”  -  and would feature elements of NATO Forces (Primarily British) versus Warsaw pact forces. The briefing for the game is included here for your perusal as are the special rules. 


Tony Baker was running the game. I was the NATO commander and my youngest Xavier was my WARPAC opponent. 

Some pictures of the setup 


As NATO forces are defending I had to deploy first. 
I opted to place one platoon in Vimburg and one platoon at the bridge. The tracked rapier support was in the open ground to best track any in bound enemy air assets as they come in. And two of my three tank troop forward on a gun line and one back. 


Once everything was set up we set off into the first turn. 
Just prior to the first turn the WARPAC played his saboteur (one of the civilians attacked the wires on the bridge this had the affect of remove D6 or our preparedness for bridge demolition. This had the real effect of cancelling out the NATO bridge preparedness roll. The Soviet turn started with a WARPAC air attack from a MiG 23 - Flogger which was driven off by the tracked rapier. Turn two to four continue in a similar fashion. The highlight being the shooting down of a Flogger in turn four. Turn five saw WARPAC elite troops arrive on the table in two Mi-8 Hips. A a fast response by the NATO contingent sees one of them shot down. The remaining troops dismount and begin to mount an assault on the bridge and environs. The NATO reaction to this is to bolster the bridge defence with the tank troop (three Chieftain Tanks). The Tracked Rapier continues to see off the air threat. Turn six sees the beginning of NATO elements falling back through the battle area to a staging point at the rear (off table) of the battlefield. First through here are a number of west german army elements. From this point on an number of elements move through the combat area during the game. Turn seven through ten sees the NATO and WARPAC elements engaged at the bridge. By turn eight the preparedness number is up to forty (halfway to target) and yours truly is feeling confident of achieving the target.  At turn ten three things happen , the air attacks stop, artillery starts and the WARPAC armoured elements enter the table. The WARPAC artillery cannot be countered and is adversely affecting the bridge preparedness which in conjunction with my poor dice rolls is now a problem. So much so that by games ends I will have only gained eighteen more of the forty points I need to drop the bridge. The NATO tank troop is out of position and wastes valuable time repositioning itself to counter the WARPAC armour. All the while NATO elements enter the battle area and exit to the rear. Around turn fifteen a troop of Chieftains (two tanks , one recovery vehicle and tank) move through area lending their firepower as they go. This event should help but in fact turns out to be a disaster. my WARPAC opponent manages in one turn to brew three Chieftains (two in the defensive troop , one the passing troop).  This is a disaster for the defenders and leaves the anti-armour element as one Tank and two Milan teams (one of which is at the rear near the bridge). The WARPAC forces push to the village of Vimburg and a vicious house to battle ensues. NATO air elements join the attack to a mixed results thanks to a ZSU-23-4 Shilka being present. At the rear elements of an elite WARPAC Helicopter borne forces push towards the bridge in another effort to press the advantage. The NATO Bridge guard manages to see that attack off. 
As the game ends the WARPAC forces have managed to get a foothold into Vimburg and are pushing the NATO elements out. The Bridge is not ready for demolition although all retreating NATO elements have managed to get through safely. The end result (as agreed by both sides) is a slim victory for the WARPAC forces.


Conclusion 
A good day’s gaming with an interesting period and ruleset. This is a game and a scenario we will come back to. Our plan is to Demonstrate this game at some shows (watch this space).


Finally thanks to all who took part. Tony Baker for taking time out to organise and run the game. Xavier for being a good opponent.  

--------------------------------------------------------------------

Introduction

The Demolition Guard. In North West Europe the rivers and canals play a profound part in the politics of the countries they flow through. In times of Peace commercial highways in time of war formidable obstacles to any military operation .Since most of these waterways flow from South to North the control of the bridges over them are of vital strategic value to the defence of the west.Many will be destroyed as soon as hostile forces threaten them these are termed preliminary demolitions.A much smaller number essential to the movement of friendly forces in attack and defence and capable of demolition in a single phase would be kept intact until the very last moment these are termed reserve demolitions and as well as bridges the term defines any point on a route who's use and closure the tactical commander wish's to control. It could be a minefield gap or an important defile but whatever form a reserve demolition takes high priority must be given to its defence right up to the moment of its destruction this is the task of the demolition guard commander.its often been said he who would live in peace must prepare for war so most reserve demolitions would be earmarked well in advance of hostilities giving the guard commander ample of opportunity to plan his defence. 


--------------------------------------------------------------------
NATO BRIEF

THE MISSION 

D, company combat team is to deny the bridge to the enemy until Currie force has withdrawn the home bank of the river Eissen.

EXECUTION AND GENERAL OUTLINE.

You will hold the bridge with two platoons, one Tank troop, a close Recce troop, one Milan firing post and one blow pipe firing post.10 platoon and two tanks are the forward platoon/troop in the Village of Vimburg and will cover the road block.11 platoon will be the close guard platoon on the bridge and will cover the open ground to the rear of the bridge.12 Platoon is the reserve platoon and will cover an open area code named black pig.And the close recce troop is to provide a screen to the east of Vimburg. All other element's to be deployed at the guard commander discretion. Currie force is currently digging in to cover the Autobahn code named 73 Easting where they will briefly engage the enemy then withdraw across the bridge at Vimburg. There is a detailed plan for withdrawal but in the fog of war units may well be delayed YOU must be sure that all of Currie forces Serial are accounted for before you begin your own withdrawal and demolition of the bridge.

--------------------------------------------------------------------
WARPAC BRIEF 
You are the commander of the 212 Motor Rifle regiment your task is to capture in tact the bridge at the German town of Vimburg to help you do this various other elements not attached to your regiment such as Divers, East German sleeper agent's (sabotage) , air attack ,Artillery and VDV (heliborne) infantry will be available to you.

--------------------------------------------------------------------
SPECIAL RULES


Starting from turn 1 The Brits need 80 points to get the bridge to state 1 ready for demolition, to get the bridge to state 1 roll 1x D10 at the start of each turn until you reach 80 points. For each piece of sabotage or each hit on the bridge the Soviets achieve the Soviets Roll 1 x D6 this is deducted from the Brits total points.

--------------------------------------------------------------------
Author:

Denis Jackman is a stocky Irish man with a love of history and a passion for designing and running games. He can be seen at some of the regular shows (mostly drooling over other peoples work). He works in IT and writes his own blog at TableTopMadness. He can also be found lurking in the various forums and groups. Do drop along and say hi.

BLUE on BLUE Training EX - AAR by Dan Mclean

64 point BLUE on BLUE Training EX   by Dan McLean Warsaw Pact Forces Armoured Calvary Troop HQ Call Sign RED HA...